
This post may contain affiliate links which means I may receive a commission for purchases made through links. I will only recommend products that are valuable to my readers! Your participation has no effect on pricing.
I am sure that you’ve been doing your research and due diligence, looking for the best advice and tips out there to help you along the way to learning photography. I know from personal experience, there are a lot of really smart and ingenious instructors out there. Take in as much as you can read books, magazines, watch videos, you’re a beginner photographer, so take it in like a sponge! There are going to be a lot of new terms thrown at you, terms you have never heard before, and you are going to get confused, and will stay that way until you start seeing some of the results of your trial and error process we’ve all gone through. Think of it as a new language all it’s own!
So, with all that in mind, I am going to keep this simple, really simple! You don’t want any confusing explanations and we don’t want anything going over your head. We are going to try and avoid a lot of the “tech talk” out there. Let’s be real here…there is a good chance that some of you reading this haven’t even picked out your camera yet and may still be using your cell phone’s camera and are ready to graduate to the next level of photography so you can start capturing great shots without any fuss! So, let’s get you started!
Quick bonus before we get started: I get asked all the time, “What’s the best camera for a beginner photographer?”
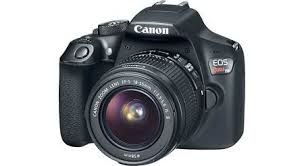
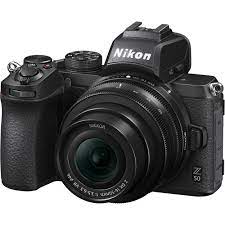
The first thing I tell my students is this: get a camera that has interchangeable lenses. Anything else is a waste of your time if you are serious about the quality of your work! As far as the brand, well, you can’t go wrong with what I call the “big 3”: Sony, Canon, and Nikon. they all have a great product with amazing features and tech!
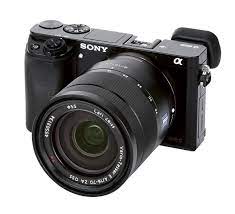
Here are my three favorites for beginner photographers, the Nikon Z50, Canon EOS Rebel T7, and Sony a6000. These are really awesome choices for folks just starting out, and they’re inexpensive options also. When you decide to go shopping, keep your eye out for bundle savings, you can save big and get a great set up with lenses, camera, bag, and other goodies!
Modes Made Easy: You know that fancy camera you have got your eye on? Or maybe you’ve already found the camera to start your photography with. Either way, it has different modes for different types of shots you’re wanting to take. think of them like “presets” that help you get awesome shots with very little confusion and effort. For example, let’s say you want things super easy… Start with “Auto” mode. It is usually highlighted by being the only “green” selection on the dial. 
So, what does auto mode do? Pretty much just what it states, it will set everything in the exposure triangle for you…just like your cell phone camera does. So all you do is point and shoot, providing your lens has auto focus enabled, but we will get into that in another lesson.
After you have had some fun with the auto mode, it is time to try “Aperture Priority” or “Shutter Priority” to control some cool stuff yourself. These settings will allow you to control one aspect of the camera’s mode settings, but then it will do everything else for you.
- Aperture Priority simply put means an exposure system used in some automatic cameras in which the aperture is selected by the user and the appropriate shutter speed and ISO settings are automatically adjusted by the camera depending on the aperture setting you have selected. *Now an important note is that aperture is also known as the “F-stop” setting.
- Shutter Priority gives you the user the choice of selecting the shutter speed, giving the rest of the control to the camera
There are several other modes available depending on the camera, but most of them are icons for different choices of shot you want to do. For example, if there is a runner on the dial, that means that the camera has an automatic “sports” mode which is a choice by the camera for very fast shutter speed to freeze the action. We recommend experimenting with them all as a beginner photographer. This will help you to understand and realize the abilities of your camera before you go into “it’s all on you” mode or the upper case “M” on your mode dial which stands for manual mode. This is where you have complete control of the exposure triangle. Or if you are a Star Trek fan… “You’ve Got The Con” mode!
 What does exposure triangle mean anyway? Think of exposure as just a means of how light or dark your photo is. One side of the exposure triangle is aperture, another is shutter speed, and the last is ISO. Now, don’t be scared by the fancy words. Imagine for a moment that you’re in a very dark room. You open the curtains-(aperture) until the light is comfortable. Now you keep your eyes open for a while making sure its not too bright – (shutter speed), and maybe turn on a lamp- (ISO) to light the room up perfectly. Balancing these things is the exposure triangle… not too bright, not too dark.
Now that you have a grasp on the exposure triangle…we have to take a step back and let you know that it isn’t always that simple. There are a zillion variables that can come into play that you have to compensate for. This is where the biggest key element comes into play…practice! Practice, practice, practice. Shoot so many photos that you get blisters on your shutter release finger! Practice, trial and error will help you to start learning some of the variables that all photographers have to master to get “the shot”. For instance, objects in motion. This is where knowing how to adjust your exposure triangle to compensate for the higher shutter speed required to freeze the object or person in motion. Or maybe you want to photograph a spectacular sunrise or sunset. Now we have to adjust our ISO or shutter speed to compensate for the low light levels.
- Aperture: This setting determines the amount of light being allowed through the lens – to the sensor. This is commonly referred to as the F-stop setting. The numbers that correspond with the aperture are the f-stop settings. These numbers vary depending on the lens being used. Another aspect of aperture is controlling depth of field or what is in focus and what isn’t. The larger the aperture opening is (the lower numbers in your view finder) the less the focal length or area will be. To give you an idea: in normal daylight, with an aperture setting of F1.4 the focal depth may only be about 3-5 ft. This means if you have focused in on your subject, everything beyond the couple ft in front of your subject and the same behind them will be out of focus and gradually get more out of focus the further the distances are. this is a great effect for portraiture since it softens the look of everything except the subject! Very cool! Likewise a narrower aperture setting, like F22 will give you a much larger focal area… even up to infinity!

- Shutter Speed: Beginner photographers often struggle with this setting. Mainly because of the importance of mastering the aperture settings. This is completely understandable when wanting to control the depth of field and the focal range. But pay close attention to this section, because shutter speed can create some amazing results. I cut my teeth on sports photographer years ago and had a crash course on the importance of shutter speed. Most of us have seen a photograph from outstanding sports photographers freezing the moment when a baseball player makes contact with a pitch…the ball is frozen on the barrel of the bat in immaculate focus. That is shutter speed doing its job. Granted, not every camera made has the ability , but most DSLR’s and mirrorless cameras do have this ability. On the other hand, shutter speed can do other magical things by setting slow shutter speeds to blur motion. A great example of this is a photo of a water control when the water seems overflowing and softened. This is great setting to experiment worth. Practice with doing some fast action sports photography, then try to do some nature shots with the shutter set really slow. *Note: when using slow shutter speeds (below 100) use a tripod to eliminate camera movement and vibration.

ISO Setting: The final leg of the exposure triangle…Whew! Ok, what does ISO do, and what is it for. ISO is the numeration factor of the sensitivity of the camera sensor. When it is bright outside, lowering the ISO setting will darken the photo. Night photography is enhanced by raising the ISO levels. A quick tip: the lower the ISO settings, the less noise that will be in your photo. Noise is an amount of pixel distortion allowed into the photo…the less noise the clearer the photo. Now likeI keep saying in this article…practice, then practice some more!
Sorry for the length of this section of this blog training article, but exposure is by far the one manageable action a photographer can take to effect their photos. Sure lighting is important, as well as settings and subjects is huge, but mastering the exposure triangle will make everything else seem like play time!
Think about this for a moment, unless you have terrible vision, when you look at something, it’s clear, right? Your camera wants the same thing! Chances are, your DSLR or missorless camera has a very good auto focus mode. 999 times out of 1000 it will nail the focus perfectly. But I will show you a secret you may not know…your camera has the ability to manage several types of focus settings. Learning these secrets will take your ability to “catch” that perfect shot it crystal clear focus almost every time.
- “Single Point Focus” is a setting in your cameras menu. This focus setting will set your camera to focus on a very specific area in the view finder. This is a great setting to use when working with portraits for example, because your main focal point should be the eye of your subject. getting a precise focus here is an absolute must.
- “Continuous Focus” is like magic for moving subjects to photograph. Any of you future sports photographers will appreciate this focal setting because you can keep a moving object in perfect focus as it continues to move. Racing photographers know that continuous focus is mandatory!
- Feeling a little daring? Give manual focus a try. Myself, and many other professional photographers like using manual focus, especially for still objects and using a very narrow depth of field. When inches can make all the difference in perfect focus and just missing it, manual focusing can really save a shot! So if you’re feeling large and in charge, try doing some manual focusing and see how your eye is. Practice makes perfect
 `
`
So, what is composition? Think like a painter, using your canvas to not just paint a picture, but instead, paint a story. Now, imagine dividing the photo you are about to take with tic-tac-toe lines. Now, put the coolest stuff where those lines cross. That’s the rule of thirds. Don’t confuse this with making sure everything you shoot is always in the center of your photo, instead use the imaginary tic-tac-toe board to position the important elements of your photo in such a way that it tells the story of the photo and the moment. Just like if there’s a cool line in your scene, like a road or a river, use it to lead eyes to the main show.
Learn more about this vital subject of composition here:
